
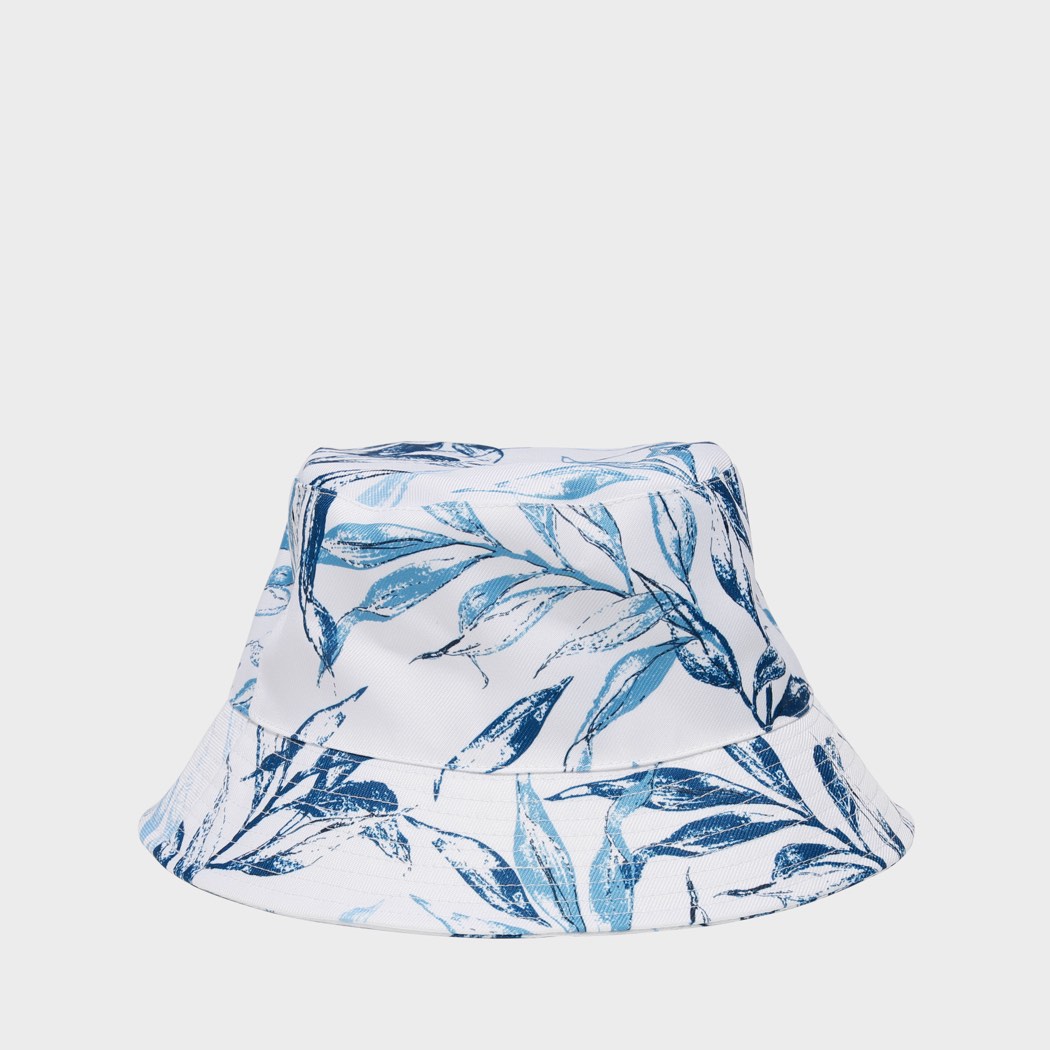
A print can look continuous in a flat artwork file and interrupted on the finished bucket hat. Crown band, top and brim are separate pattern pieces. Once the pieces are cut and sewn, a leaf, stripe or logo may change direction or disappear into a seam. Buyers should approve placement on the sewn sample, not only on a screen mockup.
This guide is for brands specifying a printed bucket hat for retail, staff or an event. It focuses on where the artwork goes and how to communicate the acceptable result. Fit and sizing still need their own sample approval; our custom bucket hats page covers those decisions.
Choose between a repeat pattern and a placed graphic
A small repeating pattern is usually easier to distribute around multiple pieces than one large image that must land at an exact point. A placed graphic can work, but it needs more explicit artwork and cut-piece instructions. Decide which part is the visual priority: the front of the crown, the top, the brim or the complete silhouette.
If a graphic contains text or a recognizable mark, place it where a seam or brim fold will not break it. If the visual idea depends on one leaf connecting perfectly from crown to brim, discuss how the pieces are cut and sewn before promising the effect. A photo of one sample does not prove every repeat will register identically in bulk.
The table below compares the two artwork approaches on what each one requires before sampling and what to check on the sewn sample.
| Artwork approach | Decide before sampling | Check on the sewn sample |
|---|---|---|
| Repeat pattern | Print direction, the repeat start point, and which seams matter most. | Pattern scale, registration across pieces, and continuity at the named seams. |
| Placed graphic | The visual priority (front, top, brim, or complete silhouette) and explicit cut-piece instructions. | The focal point on the worn sample; text and marks clear of seams and brim folds. |
Map the artwork to the actual pattern pieces
Ask for a layout showing the crown top, crown side pieces and brim pieces separately. Mark front center, back center, grain or print direction, seam allowance and the visible area after assembly. The visible artwork is not the same as the cut edge: fabric disappears into seams, and curved pieces change how a straight artwork line reads on the hat.
For directional prints, specify which way the motif should face on the crown and brim. For a photographic or large-scale print, indicate the central subject and the parts that may be cropped. Avoid a single “all over” instruction that leaves the cutting team to decide where every hat begins within the print repeat.
Set a realistic seam-matching standard
Identify the seams that buyers or wearers will notice most, such as front center and the join between band and brim. Decide whether the priority is exact alignment at one point, general pattern continuity or balanced appearance at normal viewing distance. These are different standards.
On a curved hat, the design may not match at every seam simultaneously. Brim stitching and folds can distort an apparently straight line. Agree on which discontinuities are acceptable on the approval sample, with close-up photos. An unqualified demand for “perfect pattern match” can create a dispute without telling the supplier what to inspect.
Review the printed fabric and finished hat together
Color and scale can change between a screen mockup and the chosen fabric. Check a physical print sample for the color range, pattern scale, legibility and hand feel. Then check the sewn hat in front, side, back and top views. Look at the crown seam, band-to-brim seam, brim underside and stitched edge.
If the design runs across the brim, inspect it while the hat is worn as well as laid flat. Brim angle and crown depth can hide parts of the print. A hat that looks striking on a white-background product photo may feel too busy or put the brand mark out of view when worn. Ask someone unfamiliar with the artwork to identify the intended focal point on the physical sample.
Put the approved result into the production brief
- Final artwork version and color reference, with the printing method to be confirmed for the selected fabric.
- Pattern-piece layout showing orientation, placement and crop zones.
- Front, side, top and underside photos of the signed-off hat.
- Named seams where matching is required, and a visual tolerance or sample-based standard.
- Separate approvals for each colorway or print scale if they differ.
- A note on how any label, patch or embroidery interacts with the printed artwork.
Keep these instructions with the sample record and carton identification, especially when the order has several designs. The hat artwork guide explains the broader file handoff; this article addresses the bucket-hat-specific placement decision.
SN’s usual starting minimum for regular custom hats is 100 pieces per style, per color. A printed design’s feasibility and commercial terms depend on the fabric, method, colorways and project specifications. Send your artwork, a reference hat or fit target, estimated quantity by style and color, and tell us which seams must look aligned. We can review these points before a sample is approved. Discuss your bucket hat project.
Frequently Asked Questions
Can an all-over print cross every bucket-hat seam perfectly?
Do not assume so. The hat is assembled from shaped pieces. Choose the seams where alignment matters, inspect the sewn sample and document the acceptable result.
Should the logo be embedded in the print or added separately?
That depends on visibility, fabric, artwork scale and decoration compatibility. Compare both options on a sample; keep the logo clear of a seam when possible.
Is the fabric swatch enough to approve the print?
No. A swatch helps check color and print quality, but only a sewn hat shows placement, seam breaks and how the brim changes the design.